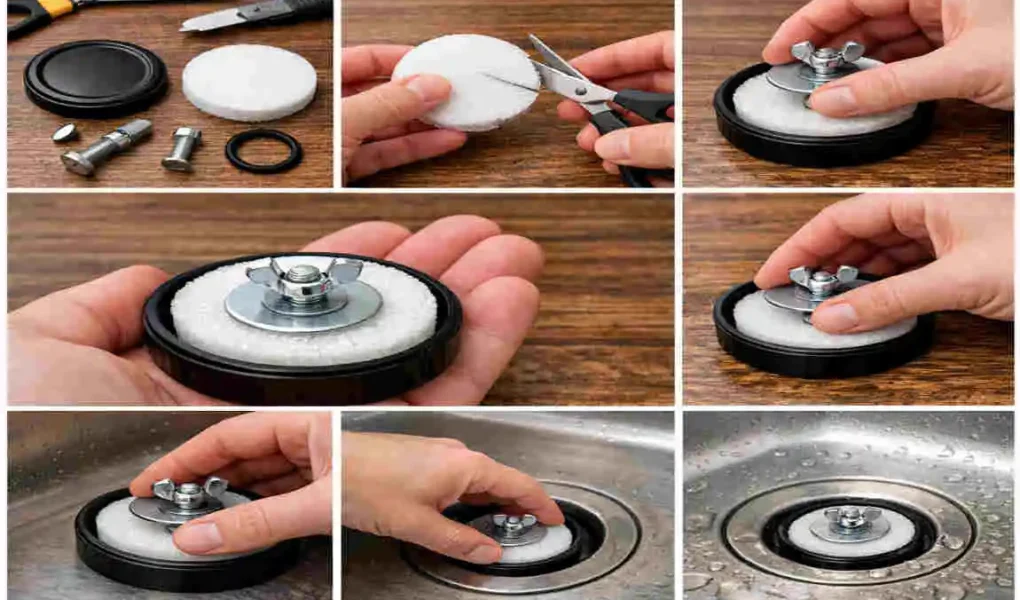
A kitchen sink drain plug may look like a small part, but it does an important job. It helps hold water in the sink when you need to soak dishes, wash vegetables, or fill the basin for cleaning. When it works well, you barely notice it. When it fails, you notice right away.
A worn or damaged plug can cause several annoying problems. It may leak, refuse to stay in place, drain too slowly, or get stuck when you try to remove it. In some cases, the plug may be old, cracked, or no longer the right size for the sink.
That is when a replacement kitchen sink drain plug becomes the simple fix you need. The good news is that many basic replacements are easy enough for a homeowner to handle without calling a plumber. If you know what kind of plug you have and follow a few careful steps, you can often replace it yourself.
Understanding Kitchen Sink Drain Plugs and Their Types
What Is a Kitchen Sink Drain Plug?
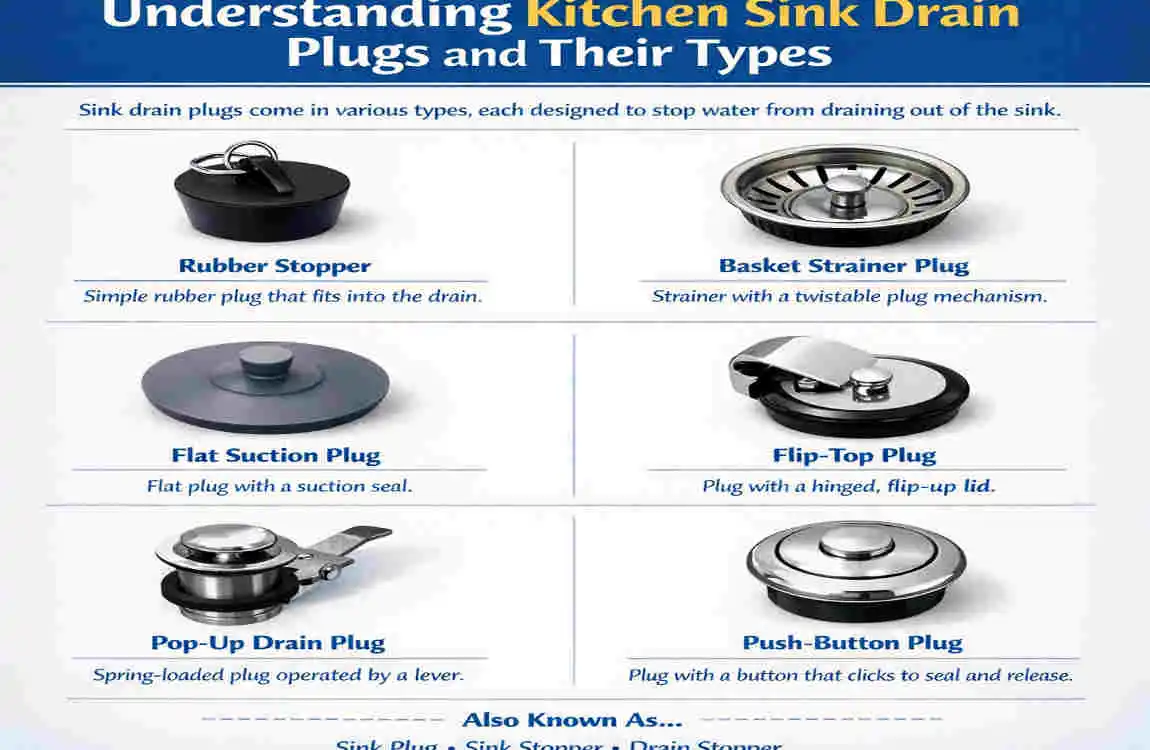
A kitchen sink drain plug is the part that closes the drain opening to keep water inside the sink. Some people call it a stopper, while others may call it a drain plug or a drain insert. The terms are often used in similar ways, but they may refer to slightly different styles.
A drain plug usually means any part that blocks the sink opening. A stopper often refers to the part that seals the drain from above. A strainer is a little different because it helps catch food bits while still letting water pass through.
So before you buy a replacement kitchen sink drain plug, it helps to understand which part you actually need. Some sinks use a simple removable plug. Others use a built-in stopper assembly with moving parts under the sink.
Common Types of Sink Plugs
There are several common styles, and the right one depends on your sink and drain assembly.
Basket-style drain stoppers sit in the drain and can often be lifted out by hand. They are simple and common in many kitchen sinks.
Rubber or flat drain plugs are basic round or flat pieces that press into the drain opening. They are simple, low-cost, and easy to replace.
Lift-and-turn stoppers twist to lock into place. You usually lift and turn them to open or close the drain.
Pop-up or lever-operated styles are often connected to a mechanism under the sink. These are more common in bathroom sinks, but some kitchen setups may use similar systems.
How to Choose the Right Replacement
The best replacement is the one that fits your sink properly and closely matches the old design so it works without trouble. Start by checking the drain opening size. If the plug is too small, it will leak. If it is too large, it may not sit correctly.
You should also match the plug style. A simple rubber plug will not replace a lift-and-turn stopper in the same way. The shape and function matter just as much as the size.
Material and finish also matter. Some plugs are made from rubber, plastic, or metal. If your sink has a visible drain area, you may want a finish that matches the faucet or sink hardware.
If possible, take the old plug with you to the hardware store. That makes it much easier to compare sizes and styles side by side.
Tools and Materials You Need for the DIY Replacement
Before you start, gather everything in one place. That keeps the job simple and reduces the chance of stopping halfway through.
You may need:
- Replacement kitchen sink drain plug
- Adjustable wrench or pliers
- Screwdriver
- Bucket or small container
- Cleaning cloth
- Mild cleaner or warm soapy water
- Plumber’s putty or sealant, if required
Safety Tips Before Starting
A little preparation makes the job much easier. Clear the space under the sink so you can reach the drain area without bumping into stored items.
Place a bucket underneath if you will be working below the sink. That way, if any water drips out, it will not soak the cabinet floor.
Do not force stuck parts. If something will not move, check the design again instead of pulling hard. For some repairs, you may also need to shut off the nearby water supply, especially if you need to disconnect plumbing components.
How to Replace a Kitchen Sink Drain Plug Step by Step
Remove the Old Drain Plug
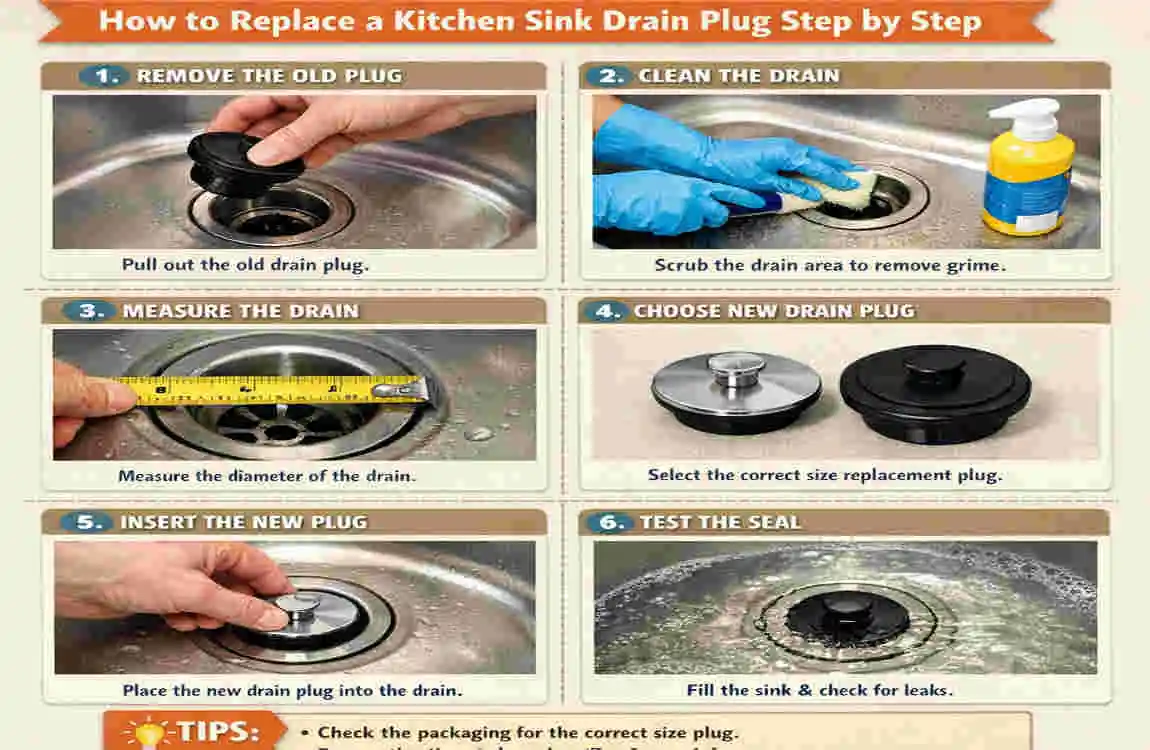
Start by looking at how your current plug works. If it is a simple removable plug, you may only need to lift it out by hand. If it is a twist style, turn it gently to release it.
For a plug connected to a lever or stopper assembly, check under the sink to see how the parts fit together. Some models have clips, screws, or rods that must be disconnected first.
Keep any small screws, clips, or washers in a safe place. Even if you are replacing the full plug, these parts can help you compare the old setup with the new one.
Clean the Drain Opening
Once the old plug is out, clean the drain area before installing the new one. This is an important step that many people skip.
Remove food bits, grease, soap buildup, and any loose residue around the drain. A cloth and some warm soapy water are often enough for basic cleaning.
Also check the drain opening for cracks, corrosion, or rough edges. If the drain surface is damaged, even a new plug may not seal correctly.
Check the Replacement Plug
Before installing the new part, compare it with the old one. Make sure the size looks right, and the style matches the sink setup.
Check whether the new plug sits fully in the opening or needs to be attached to a stem, lever, or fitting below the sink. This helps you avoid surprises during installation.
If the replacement seems loose, too small, or too large, stop and recheck before moving forward.
Install the New Plug
Now place the replacement kitchen sink drain plug in the drain opening. Follow the plug’s design carefully.
If it is a simple plug, press it into place. If it is a twist style, insert and turn it as directed. If it has a fitting under the sink, connect the parts slowly and carefully.
Tighten fittings gently. Do not overtighten, because that can damage seals, threads, or plastic parts. A snug fit is usually enough.
Test the Sink
After installation, test the plug right away. Fill the sink with a small amount of water and watch whether it holds properly.
Leave it for a few minutes and check for leaks around the drain. Then open the plug and make sure the water drains smoothly.
If the sink does not hold water well or the plug feels stuck, go back and inspect the fit before using it normally.
Common Problems After Installing a Replacement Drain Plug
The Plug Does Not Fit
This is one of the most common problems. It usually means the drain size or plug style does not match the sink.
Measure the drain opening again and compare it with the replacement. Do not try to force a bad fit. That can damage the sink or the new part.
The Plug Leaks
If the plug leaks, the seal may not be sitting properly. A rubber gasket may be worn, missing, or installed incorrectly.
Check the drain opening for damage too. A rough or corroded surface can keep the plug from sealing well.
The Sink Drains Slowly
The plug itself does not always cause a slow drain. Sometimes debris is trapped below the stopper, or grease has built up around the drain basket.
Clean the plug area first. If the problem continues, the clog may be deeper in the drainpipe.
The Plug Gets Stuck
A stuck plug often occurs due to misalignment, grease buildup, or an old locking mechanism. Clean the area well and try again gently.
If the part still jams, confirm that the plug type matches the sink. A mismatch can cause repeated sticking.
Maintenance Tips to Make Your New Sink Drain Plug Last Longer
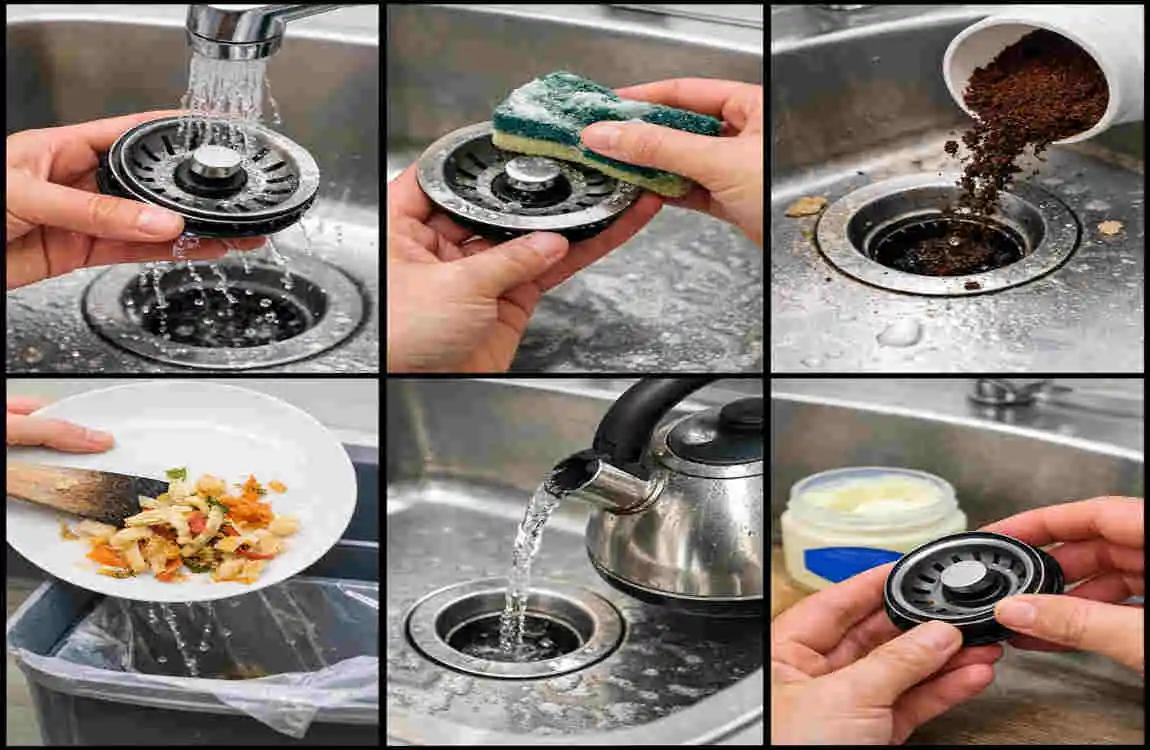
A replacement plug can last much longer if you care for it properly. Small habits make a big difference.
Clean the Plug Regularly
Wipe the plug and drain area often. Food particles, grease, and soap residue can build up and affect how well it works.
A quick clean now and then helps keep it moving smoothly.
Keep Food Out of the Drain
Try not to let large food bits go down the sink. Even a small amount of buildup can affect the stopper over time.
A sink strainer can help catch scraps before they reach the drain plug.
Avoid Excessive Grease
Grease is a common cause of drain trouble. It can coat the stopper, make parts sticky, and cause buildup in the drain.
Pour grease into a container instead of down the sink whenever possible.
Check Seals and Washers
Rubber seals and washers wear out over time. If the plug starts leaking, inspect these parts first.
Replacing a worn seal early can prevent bigger problems later.
Remove Buildup Before It Becomes a Problem
If you notice slow movement or a gritty feeling, clean the plug sooner rather than later. Buildup is easier to remove before it hardens.
Replace Damaged Parts Promptly
If a washer, seal, or small component is damaged, replace it quickly. Waiting too long can cause repeated leaks or poor drainage.
When Should You Call a Professional?
Some plug replacements are easy. Others point to larger plumbing issues. Call a professional if you notice:
- Persistent leaks after replacement
- Badly corroded drain parts
- A clog beyond the stopper
- Water leaking inside the cabinet
- Damage to the sink or plumbing connection
A plumber can identify underlying issues and help prevent water damage.
FAQs About Replacement Kitchen Sink Drain Plugs
Can I replace a kitchen sink drain plug myself?
Yes, many simple stopper replacements are DIY-friendly. If the plug is basic and the drain setup is easy to access, you can usually do it yourself.
How do I know what size replacement kitchen sink drain plug I need?
Measure the drain opening and compare the old plug with the new one. Matching the size and style is the safest approach.
Are kitchen sink drain plugs universal?
Not completely. Some fit common drain sizes, but plug designs and dimensions still vary. Always check compatibility before buying.
Why does my new sink plug leak?
A leak may come from a worn seal, poor installation, the wrong size, or a damaged drain surface. Inspect each part carefully.
How often should a kitchen sink drain plug be replaced?
There is no set schedule. Replace it when it becomes cracked, worn, leaky, stuck, or no longer works well.
Can I replace only the rubber seal instead of the whole plug?
Yes, if the main plug is still in good shape. Replacing just the seal is often enough when the rest of the part is still usable.
Do I need plumber’s putty to replace a drain plug?
Sometimes yes, sometimes no. It depends on the plug style and whether the installation requires a sealing compound.
What should I do if the replacement plug keeps getting stuck?
Check the alignment, clean away buildup, and make sure the plug is truly compatible with the drain assembly.
| Step | What to Do | Quick Tip |
|---|---|---|
| Check the Drain Plug | Remove the old plug and inspect its size and condition. | Match the new plug to your drain opening. |
| Gather Tools | Prepare pliers, a wrench, cloth, bucket, and replacement plug. | Keep a bucket under the drain to catch water. |
| Remove the Old Plug | Loosen the connecting parts and carefully take out the old plug. | Avoid forcing stuck fittings. |
| Clean the Drain | Remove dirt, grease, and buildup around the drain opening. | A clean surface helps create a better seal. |
| Install New Plug | Fit the replacement kitchen sink drain plug according to its design. | Make sure it sits evenly and securely. |