If your kitchen cabinets look tired, the hinges may be part of the problem. Even small metal hinges can stand out, especially on freshly painted cabinets or with updated hardware.
The good news is, yes, you can paint hinges on kitchen cabinets if you prepare them properly. The key is to clean, sand, prime, and use the right paint so the finish lasts and the hinges still move smoothly.
Can You Paint Hinges on Kitchen Cabinets?
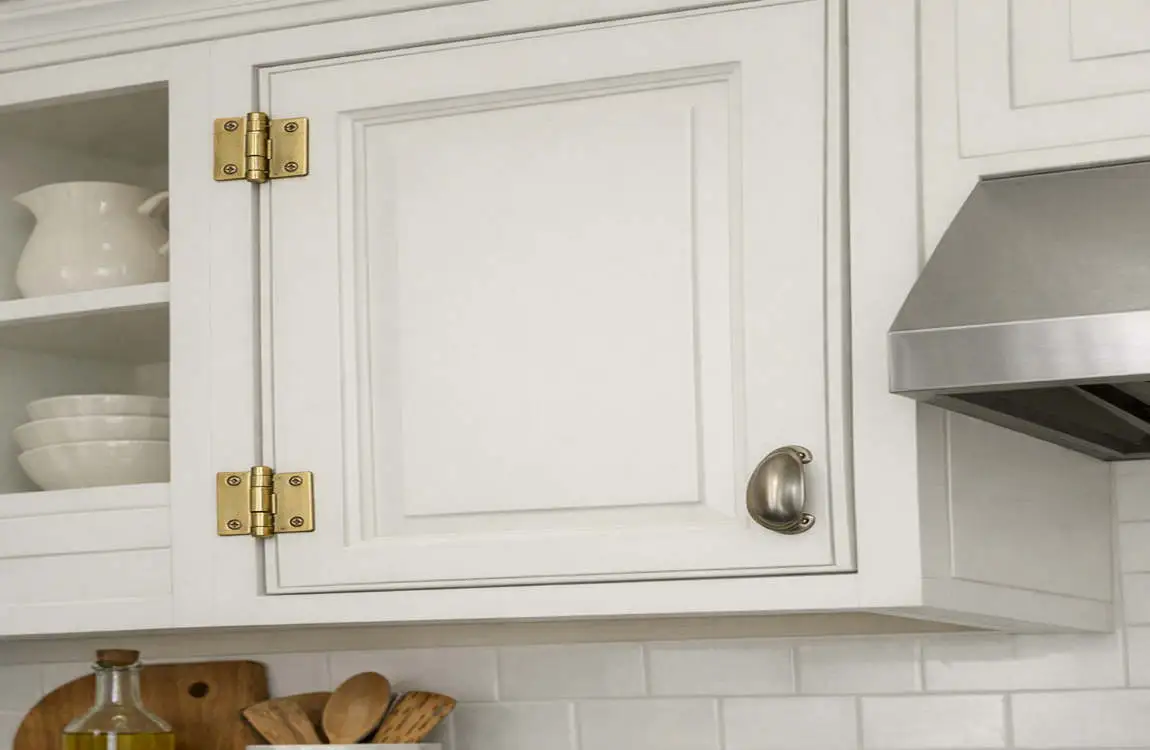
Yes, you can paint them. In many cases, painting is a smart, low-cost way to refresh your kitchen‘s look without changing all the hardware.
When painting is a good option
Painting works well if you want to:
- Refresh old or mismatched hinges
- Match hinges to newly painted cabinets
- Update the kitchen on a budget
- Make visible hardware look cleaner and more modern
If the hinges are still in good shape, paint can give them a neat new look.
When you should replace them instead
Sometimes painting is not worth the effort. Replacement is better if the hinges are:
- Rusty or badly corroded
- Loose or damaged
- Broken in the moving parts
- Not closing the doors properly
- Too outdated for the look you want
If you want a very modern style, you may also choose concealed hinges instead of painted visible ones.
Hinges that can usually be painted
Most metal kitchen hinges can be painted, including:
- Surface-mounted hinges
- Overlay hinges
- Butt hinges
- Decorative hinges
- Standard metal cabinet hinges
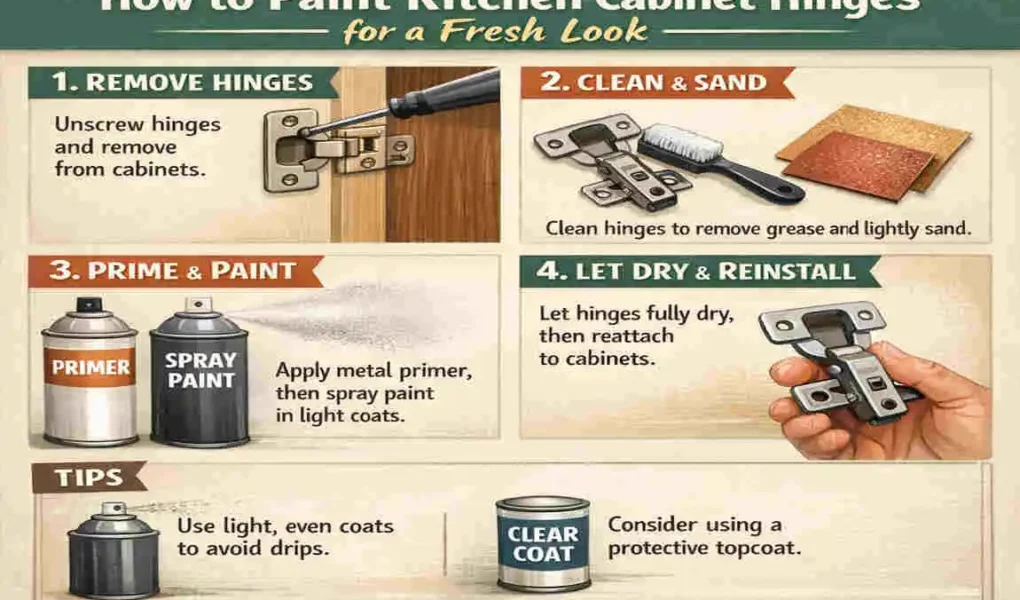
How to Prepare Kitchen Cabinet Hinges for Painting
Good preparation is the secret to a smooth finish. If you skip this part, the paint may peel or chip quickly.
Remove the hinges carefully.
Take the hinges off the cabinet doors if possible. Label each hinge and screw so everything goes back in the right place.
This step saves time later and helps you avoid mixing up hardware from different doors.
Clean away grease and dirt.
Kitchen hinges collect grease, dust, and grime over time. Paint will not stick well to dirty metal.
Use a household degreaser or a strong cleaning solution that is safe for metal. Then wipe the hinges clean and let them dry fully.
Sand the hinges lightly.
Use fine-grit sandpaper to lightly scuff the surface. This helps the primer grip the metal better.
You do not need to sand deeply. Just remove the shiny top layer and any loose finish.
Protect the moving parts.
Hinges need to open and close smoothly. If paint gets into the joints, the hinge can become sticky or stiff.
Keep paint away from moving areas, screw holes, and adjustment points.
Step-by-Step: How to Paint Kitchen Cabinet Hinges
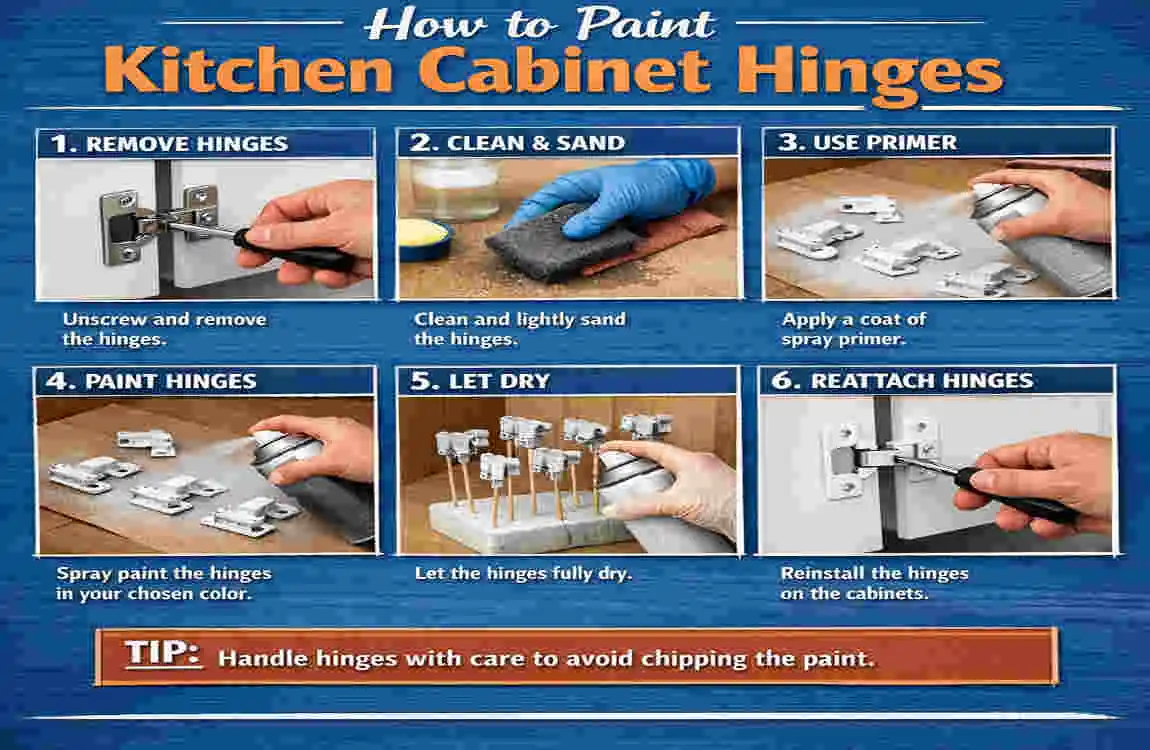
Remove and inspect the hinges
Inspect each hinge closely before you start. If one is bent, rusty, or broken, replace it instead of painting it.
This is the best time to sort out any damaged hardware.
Clean and dry the hardware
Wash off grease, dust, and leftover residue. Then wait until the hinges are completely dry.
If any moisture remains, the paint may not stick well.
Set up a painting area
Place the hinges on cardboard, newspaper, or a drop cloth. Keep them separated so you can reach every side.
Choose a spot with good airflow, so fumes don’t build up.
Apply metal primer
Primer helps paint stick to metal. It also helps the finish last through daily use.
Use a primer made for metal surfaces. Apply a thin coat and let it dry as directed.
Paint the hinges
Choose paint designed for metal. You can use either a brush or spray paint, depending on the look you want.
Apply thin coats instead of one thick coat. Thin coats dry better and help prevent drips.
Let the hinges cure
Drying and curing are not the same thing. A hinge may feel dry to the touch but still need more time to harden fully.
Do not rush this part. If you reinstall too soon, the paint may scratch or stick.
Reinstall the hinges
Once the paint has cured, put each hinge back in its original place. Tighten the screws carefully, but do not overtighten them.
Open and close the cabinet doors a few times to make sure everything moves smoothly.
Best Paint and Tools for Cabinet Hinges
Here is a quick look at what you will need.
Tool or Material | Why You Need It
Screwdriver To remove and reinstall hinges
Fine-grit sandpaper To roughen the surface lightly
Cleaning cloth To wipe away dirt and grease
Degreaser To remove kitchen buildup
Metal primer To help paint stick
Metal-compatible paint To create a durable finish
Drop cloth or cardboard To protect your work area
Small brush or spray paint To apply the finish
Spray paint vs brush painting.
Spray paint usually gives a smoother look and works well on small metal parts. It also helps you get even coverage without brush marks.
Brush painting can be easier for beginners and gives you more control. It may take longer, but it works well if you are careful.
If you want the cleanest finish, spray paint is often the better choice. For more control, use a small brush.
Choosing the right finish
Common finish options include:
- Matte for a soft look
- Satin for a balanced finish
- Semi-gloss for extra durability
- Metallic for a hardware-style look
Try to match the hinge finish with your cabinet style and other hardware.
Common Mistakes When Painting Kitchen Cabinet Hinges
A few small mistakes can ruin the whole project. Try to avoid these.
Painting without cleaning
Grease is the biggest problem in kitchens. If you paint over dirt, the finish may peel fast.
Skipping primer
Primer helps the paint stay on the metal. Without it, the finish may wear off sooner.
Applying thick coats
Thick paint can drip, crack, or build up around the moving parts. Thin coats work much better.
Painting the moving parts
If paint gets into the hinge joints, the door may become stiff or noisy.
Reinstalling too soon
Even if the paint feels dry, it may still be soft inside. Give it enough time to cure fully.
Forgetting to test first
Paint one hinge first and check the result. This helps you confirm the colour, finish, and drying time before you do the whole set.
How to Keep Painted Cabinet Hinges Looking Fresh
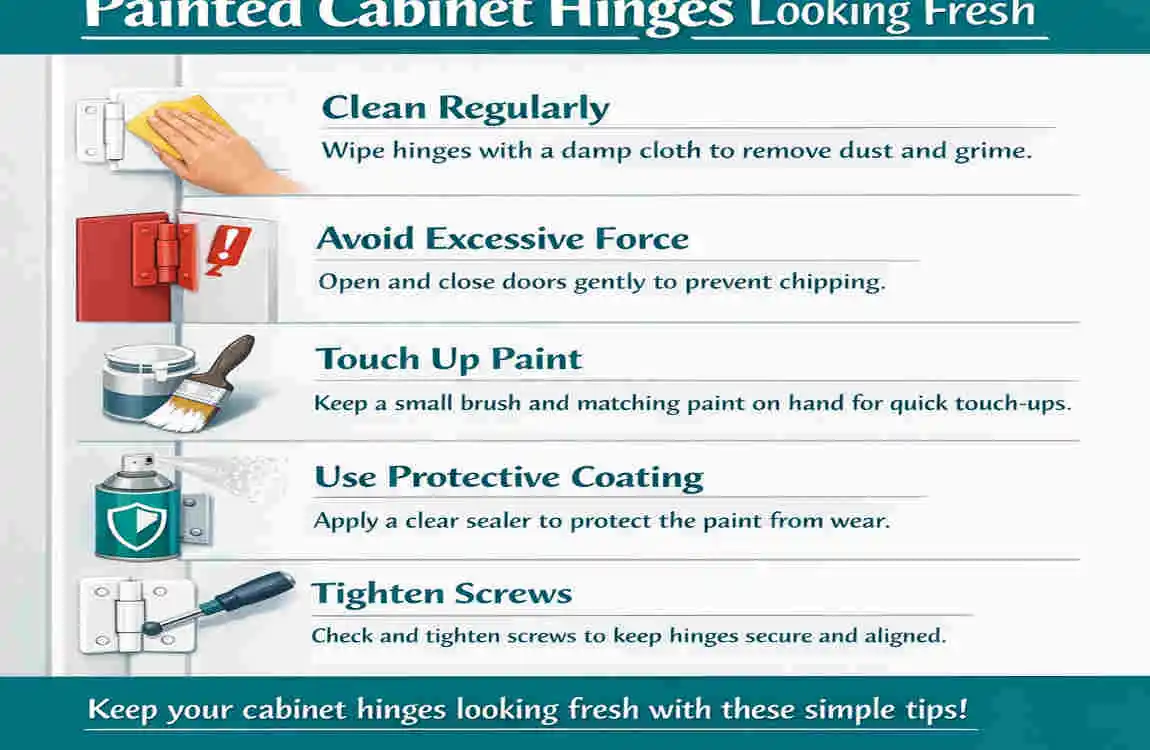
Once the hinges are painted, a little care goes a long way.
Clean them gently
Use a soft cloth and mild cleaner. Avoid rough scrubbing, since that can damage the finish.
Check for wear
Look at high-use cabinets often. If you notice chips, touch them up early before the damage spreads.
Keep them dry
Moisture can lead to rust and shorten the life of the paint. Wipe away water or steam buildup when needed.
Know when replacement is better.
If the hinge keeps chipping, sticking, or rusting, repainting may not be enough. In that case, replacing the hinge is the better long-term fix.
FAQ: Painting Kitchen Cabinet Hinges
Can you paint hinges on kitchen cabinets without removing them?
You can, but it is harder to get a clean result. Removing them usually gives you a smoother finish and helps protect the cabinet doors.
What kind of paint should you use on cabinet hinges?
Use metal-compatible paint. Spray paint made for metal often works best because it gives even coverage.
Do you need to sand cabinet hinges before painting?
Yes, light sanding helps the primer and paint stick better. It also removes any old finish that might block adhesion.
Should cabinet hinges be primed before painting?
Yes, primer is highly recommended for metal hinges. It helps the paint last longer and look more even.
Can you spray paint kitchen cabinet hinges?
Yes, spray paint is a popular choice. Just use thin coats and let each coat dry properly.
| Step | What to Do | Quick Tip |
|---|---|---|
| Remove Hinges | Take hinges off the cabinet doors. | Keep screws together. |
| Clean | Wash away grease, dust, and grime. | Use a degreasing cleaner. |
| Sand | Lightly sand the hinge surface. | Helps paint stick better. |
| Prime | Apply a thin metal primer. | Choose a primer made for metal. |
| Paint | Spray or brush on thin coats. | Avoid thick layers that can affect movement. |
| Dry | Let each coat dry completely. | Follow the paint manufacturer’s drying time. |
| Reinstall | Put the hinges back after curing. | Tighten screws carefully. |
| Maintain | Clean gently when needed. | Avoid harsh abrasive cleaners. |